
Friday, November 15, 2013
I love to play with my dies. Do you?
I made two very different cards using one die for my Die-Versions' Blog post today...

Tuesday, November 5, 2013
Holiday Tags...
I posted these 8 holiday tags over on the Die-Versions' blog today. They were all created with the newly released Winter Wonderland dies. Go check out the blog and pick your favorite. Here's a link...
http://www.die-versionsblog.com/blog/wutiwhq0x508cv5t4wk5enr36zcf0i

http://www.die-versionsblog.com/blog/wutiwhq0x508cv5t4wk5enr36zcf0i

Tuesday, October 15, 2013
Did you know...
That when scrapbooking, the NUMBER ONE thing that takes me the longest is getting my pictures ready. Why you ask... well, using the photos shown on the photo below as examples, here's why:
Step 1... Select the photos I want to scrapbook. With a topic like my hubby's Lemon Garlic Shrimp I only had 10 photos to choose from, so it was easy to select a few that told the story and would fit a one page layout. For a topic like my son's 13th bday party, I had 179 photos to choose from, so this was a far more time consuming task and honestly because of the subject matter the photos selection was more important in my mind. I knew his bday party was going to be a two page layout, so I selected 15 to 20 photos.
Tip... I copy all the photos from their appointed folder (20130830 lp's 13th bday party) to a sub folder named "print". I view the photos one at a time in the Windows Photo Gallery and delete the photos I don't want. Remember this folder has copies, so I'm not deleting the original photos. Sometimes I loop though the photos several times in order to end up w/the least amount of MUST scrapbook photos in my "print" folder.
Step 2... Edit selected photos. This covers cropping pictures, adjusting colors and lighting, adjusting image size, etc. I do this step in PS Elements.
Step 3... Planning the individual photos' printed sizes, keeping in mind how many photos I can fit on my layout. It's during this process that I sometimes decide to collage some of the photos. For collages I used Picasa.
Step 4... Creating print sheets in FotoSlate, so I don't waste any of my 8.5x11 photo paper sheet. In most cases, a print sheet will have photos for different layouts. This step is all about maximizing my photo paper, so I spend a lot of time manually arranging my photos. This step is also for photos that are not 4x6, since those I just print directly onto 4x6 photo paper.
Step 5... Printing the FotoSlate print sheets and collaged 4x6 prints.
I hope now you understand why photo selection is my NUMBER ONE time sucker when it comes to scrapbooking and honestly certain parts of the process are not my favorite part of scrapbooking. I try to do layout photo selections in batches, so that when I feel in a scrapbooking mood I can just get my printed photos and start having FUN.

Saturday, October 12, 2013
Saturday, October 5, 2013
Introducing my "Selfie" kit...
for School of Scrap:
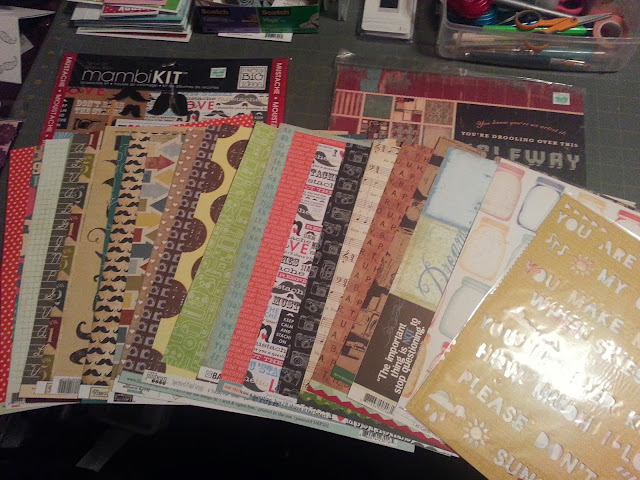
Now my kit doesn't include card stock and embellishments... I just can't make myself choice those w/o having some idea of what my layouts will look like. I'm giving myself the right to pull in card stock and embellishments as I need them, but I will be forcing myself to not use any other pattern paper and believe me that's a BIG thing for me.

Now my kit doesn't include card stock and embellishments... I just can't make myself choice those w/o having some idea of what my layouts will look like. I'm giving myself the right to pull in card stock and embellishments as I need them, but I will be forcing myself to not use any other pattern paper and believe me that's a BIG thing for me.
Saturday, September 21, 2013
Work is getting in the way of crafting...
At least, that's what I've been experiencing lately. So this weekend I was determined to enter my craft room (for the first time in days) and sit down to make a project. And this post shows the results of my crafty afternoon.
First, lets start with a photo of what I started with...

One sketch that I found on Pinterest, one 5x7 photo, two 5x3 photos, one sheet of 12x12 pattern paper, three sheets of 6x6 pattern paper, two strips of black card stock with a candle border punched out, one "happy birthday" die cut and a set of circle dies, which I was going to use for the circle elements on the sketch.
Once I had my supplies, assembling my layout went petty fast and this is what I ended up with...

I stayed true to the basic design of the sketch, but I feeling the layout could still use some more embellishments. Leave me a comment and let me know what you do think this layout needs to be complete.
Tuesday, September 17, 2013
WELCOME...
To the first ever Die-Versions Blog Hop :)
I'm Mary one of the ladies on Die-Versions's Design Team and I have TWO Birthday cards to show you today.
For today's cards I will be using the following three Die-Versions' dies:
Happy Birthday Corner Concepts
Patterned Pumpkin Whispers
Northern Maple Whispers.

For me fall goes hand and hand with birthday, because the majority of my extended family has fall birthdays. So I'm always on the look out for products I can use on fall birthday cards.
For this card I started with pattern paper for my background... I taped the Happy Birthday die cut on the top left corner of a 3"x 4" piece of pattern paper and place foam squares on the back for dimension. I added a die cut Patterned Pumpkin, which I paper pieced from two pieces of color glitter paper. As a finishing touch I added pearls and rhinestones to the middles of each flower in the pumpkin.

For this card I once again started with pattern paper for my background... I taped the Happy Birthday die cut on the top left corner of a 4"x 4" piece of pattern paper and taped the element directly onto my background pattern paper. My next layer was the Northern Maple die cut, which I taped directly onto the last layer. So far I haven't given dimension to any of the layers, so on the paper pieced Patterned Pumpkin die cut I placed foam squares before attaching it to the card.

I actually filmed the making of these cards. Here's the video:
I hope you enjoyed your time on my blog and that you come back soon. Here's some information regarding the blog hop... GOOD LUCK!
The blog hop contest will run from September 17th to September 22th. Winners will be posted on September 23rd on all the blogs. The prizes are...
1 $50 Die-Versions gift certificate
5 $10 Die-Versions gift certificates
Hoppers will need to comment on all the blog stops and then on the last stop (Die-Version's blog) and tell us which die out of all the projects they saw was their favorite. The winners will be randomly chosen from the Design Teams' blogs so make sure to comment at ALL stops as well as on facebook to increase your chances of winning. I wish you luck :)
If you came from Lori's blog, your next stop should be Penny's blog.
Anne Temple http://www.annemade-anne.blogspot.com/
Emilia van den Heuvel (Emmy): http://few-favourite-things.blogspot.com/
Grace Tolman: http://tolmanchronicles.blogspot.com/
Liz Chidester: http://thescrappiest.blogspot.com/
Lori: http://loriskreations.blogspot.com/
Mary Moisan: http://madebymarymoisan.blogspot.com/
Penny Ward: http://www.pennywardink.com/
Tanya Johnson: http://little-scrapper.blogspot.com/
Die Versions Store Blog: http://www.die-versionsblog.com/
Wednesday, September 11, 2013
On a beautiful summer day in August...
We went to the Alder Planetarium and here's the layout I create to document our trip.
It's hard to believe that with our family's love of sci-fi and all things space... and that we are all native or long time Chicagoans, this was our first time visiting the Planetarium. Goes to show, you can be a tourist in your own town.

I was able to get 27 photos on this double page layout. And I still had room for two die cuts (silver and black glitter paper) of the Die-Versions' Solar System Whisper die. I LOVE LOVE LOVE this die! Here's some close ups of the layout.

I hope you enjoy. Would love feedback, so don't be shy.
I'm back!
Yes, it's been almost a month since my last post, but it's been a very busy time for me. Late August, early September is always busy which my son going back to school, my husband's birthday, my son's birthday and my son's new band parade requirements. Throw in my going back to work full-time after four years of being a stay-at-home mom.
Now, being a stay-at-home mom wasn't something I plan for, but when I was laid off from my job as an IT Project Manger back in May of 2009 my efforts in finding another job proved unsuccessful and after a while I petty much stopped looking. To be honest... I really wasn't excited about finding a new job, because I knew that whatever job I found would most likely not be a working from home one. And a work from home job is want I had for the last 9 of the 14 years I was w/that company. I don't do change well and I was in major denied over losing the best job of my working career.
Fast forward to late summer 2013... my son is 13 and in school all day. I have a lot of free time on my hands... Thankfully I love to scrapbook and make cards, which I do a lot of. And if I'm honest, I also spend a good amount of time on Pinterest, Facebook and at the crafts stores. But none of those things pay. So when an interesting job offer (although not in my field or my old pay scale) unexpectedly came my way, I really couldn't turn it down.
So as off Sept 3rd I'm working full-time again. Dealing with a one hour commute each way, but I'm taking it one day at a time.
Now, lets get back to crafting...
Sunday, August 18, 2013
The card on the Die-Versions Blog today...
is one I made. Here's a photo of it. I love how it turned out. In the background is one of my favorite dies (the northern maple) and towards the front is another favorite (the patterned pumpkin). Doesn't the new Hay Rack die do a great job holding all those dies?

As you can tell by this card, I love love love grouping my dies. It makes a big impact. Here's a list of the dies I used on this card:
- Northern Maple whispers die
- Hay Rack whispers die
- Indian Corn whispers die
- Patterned Pumpkin whispers die
- "FALL" Little Red font die
For more ideas, go visit the Die-Versions Blog.
Friday, August 16, 2013
You never forget your first...
die and this Happy Birthday die was my very first Die-Versions die. I reach for it every time I want to send a big HAPPY BIRTHDAY to someone.

So a few days ago when I felt the need to make a birthday card, I reach for this die and after pairing it up w/a couple other dies (see end of post) I created this card...

Dies used:


- Die-Versions Happy Birthday Solo Sentiments die
- Die-Versions I Wish You Express Edges die
- The large polaroid frame was a custom Cricut cut
Friday, August 2, 2013
How about a Spanish card and video?
Here's a really quick and easy Spanish birthday card using some great Spanish dies from Die-Versions.

For my Spanish friends... En este video hago una tarjeta de cumpleaños rápida con troqueles de Die-Versions.
Dies/Troqueles (Die-Versions)


Monday, June 10, 2013
I love productive weekends, don't you?
I did some craft room cleaning and some crafting. I made a card and two layouts. The first layout is all about my most current obsession... OWLS.

They are so trendy now that it's hard not to find and fall in love with one or two of them. I walked around my house and took a few photos of the Owls I currently have on display. Some I received as gifts, some I found at stores and some at garage sales.
I love the new XOXO Express Edge from Die-Version. I find it so easy to slip into a card or layout, because a little XOXO fits most of my scrapbook themes/topics. Also from Die-Versions on this layout are the A Hint of Lime and Evergreen fonts, two current favorites of my. The large font I used for "OWLS" is an older naked clipboard set by The Girls Paperie On Holiday collection that I colored green w/a marker.
My second layout documents my son getting a SIM card as his last day of 6th grade gift. When I upgraded cell phones a few months back he took over my old cell phone, but it didn't have a SIM, so it had limited use. He now has is first cell phone and I'm already thinking about a "what's on my/your cell phone" layout.

This layout came together quickly, because I didn't over think it. I used three pieces of pattern papers... once again I went into my older paper stash, because I'm really trying to use up some of my older pattern papers. Cleaning tip: As I go thought my older paper pads, I tear out any sheets I no more like and know I will not be using. I'm putting those sheets into a give away pile.
On this layout I used some wood stars, and thought bubbles. I also used the "Life is Good" Express Edge from Die-Versions, because life is good when you get your first cell phone.
Thanks for stopping bye. Have a great Monday.
Friday, May 31, 2013
Cutting Fabric with Thin Dies
This post was inspired by a question left on my Spanish video of a few days ago. You can find the video here. In the video I talk about Die-Versions' Spanish Dies and demonstrate how to use the one I have, the "Feliz Cumpleaños" Sweet Spot. I don't know of any other company that is doing Spanish dies and felt the need to let me Spanish friends know about it.
I was asked if the dies cut fabric and the answer is yes, it's tricky, but worth trying. And that's what I did...
I ironed some Heat&Bond Lite to the back on my 100% cotton fabric.


I die cut one of my bigger dies. Die-Versions' "Happy Birthday" Solo Sentiment.

And it cut clean and beautifully, but I had to use a shim at the top of my die cutting sandwich. I used a piece of medium weight textured card stock.

Next I tried cutting the "Feliz Cumpleaños" Sweet Spot also by Die-Version. Unfortunately, I was not able to get a good cut with this die, but I'm going to keep trying with different sandwiches. If I get it to work I'll let you know.

I hope this little photo demo helps. Until next time, keep crafting.
Wednesday, May 15, 2013
Two cards... One Die
Last night I made two Graduation cards... one for a girl and one for a boy. I used the same Die-Versions die for both cards (old globe west),

Love how they came out.
Tuesday, May 14, 2013
Lets play...
Here are three dies from Die-Versions. Want to see what I made with them? Well, keep reading.


I cut off the #1 and taped the now circle mom die to the scallop. Using a scrap circle piece of card stock tape the balloon ends in a circle. I bet no one will know that those "flower petals" are actually balloons. Talk about die versatility.

Next I mounted the balloon circle onto the front of a 6x6 card, which is really a sheet of pattern paper I liked cut down to 6x12 and folded in half. I added a layer of ribbon netting and attached the top flower element on foam squares for dimension. To finish my card I punched a small scallop heart and stamped "happy mother's day".
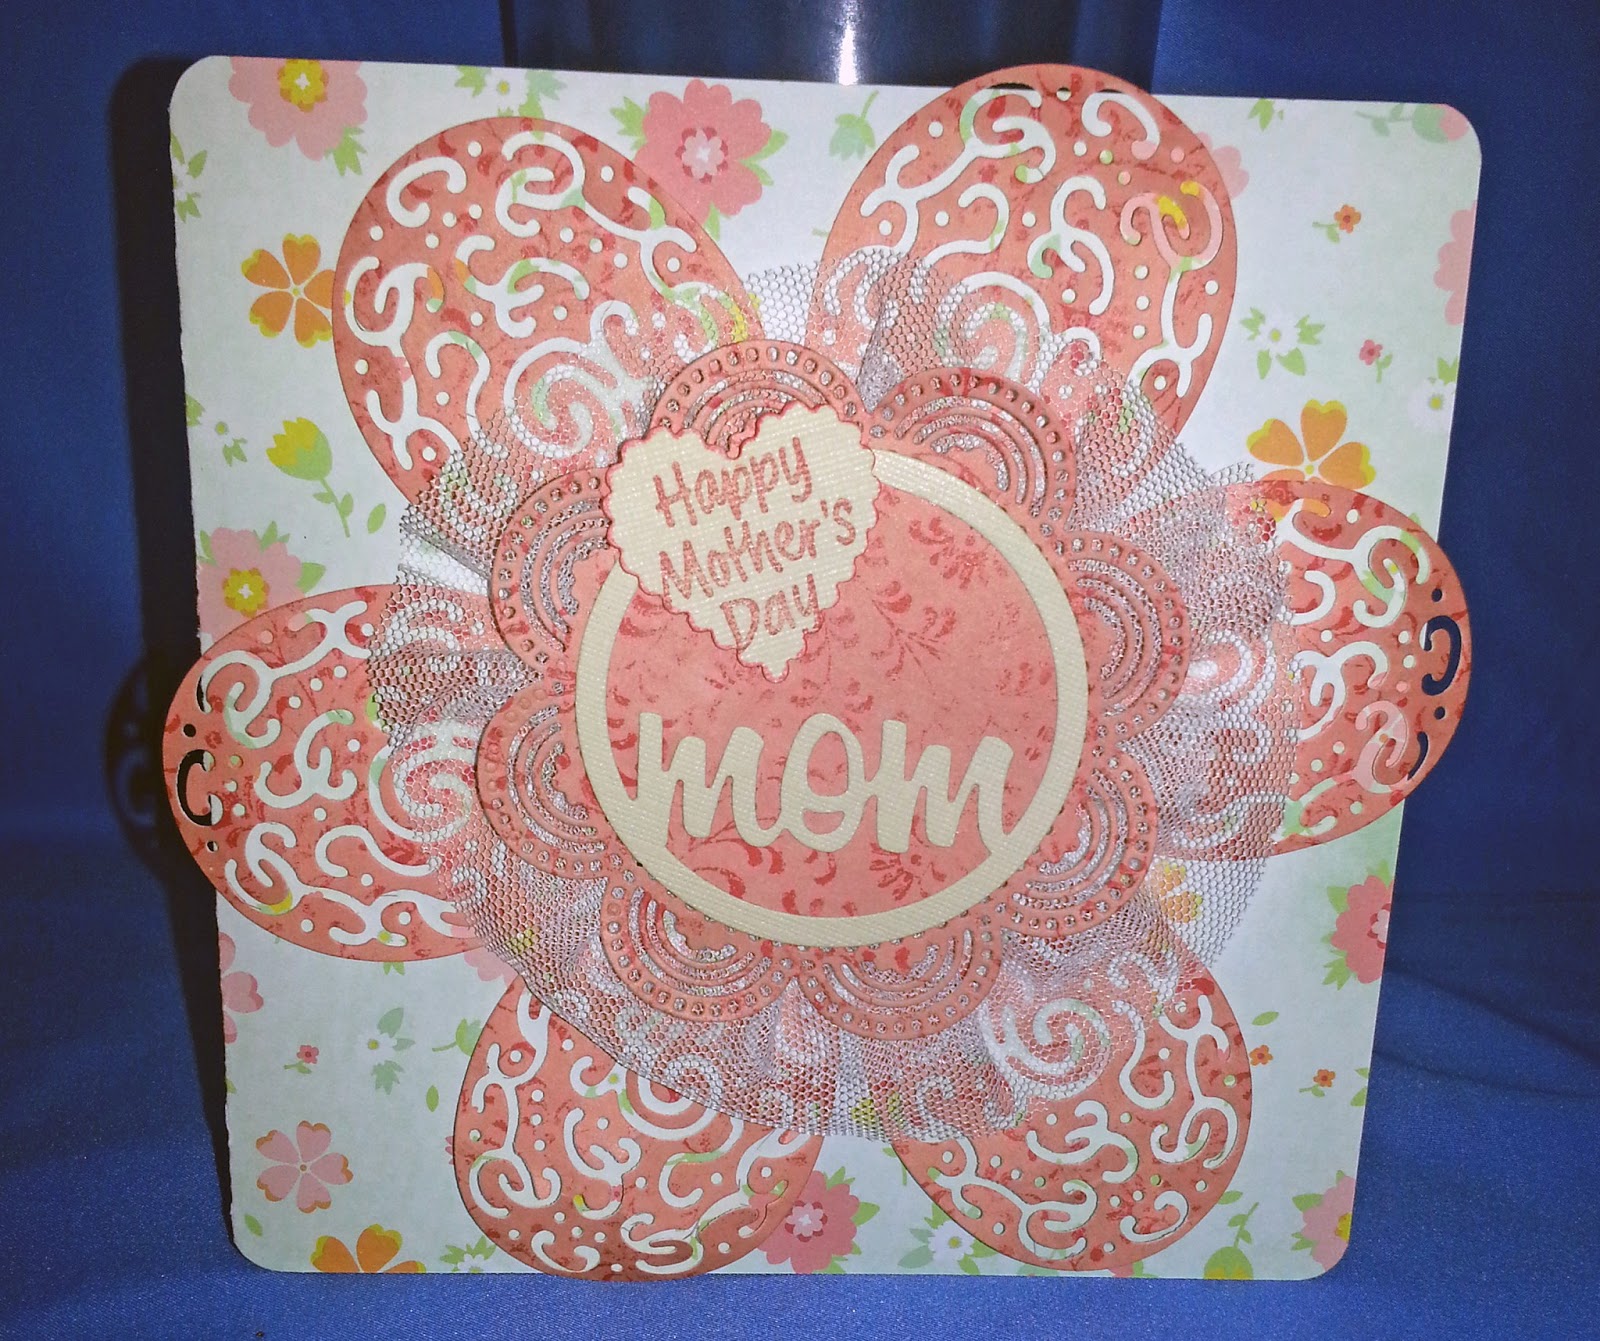
This card took me about 20 minutes to make. If you like this project and want to see more step by step projects please leave me a comment and feel free to make requests.
Monday, May 13, 2013
Roses and French Toast make for a great Mother's Day weekend...
Saturday started with roses and hubby making French Toast. Later my extended family (the three of us, plus my parents, sister and her family, brother and his family) gathered at my parents to celebrate Mother's Day w/Mami. We carpool to Dave and Busters for dinner and gaming. If this seems like a strange destination for a Mother's Day celebration, well, you just have to know my Mom. She loves games of all kinds. She was as happy playing on the Wheel Of Fortune machine as my 12 year old was shooting zombies on a nearby machine.On Sunday hubby and son made his incredible stuffed burgers... wishing there was a leftover burger for lunch today, but son ate it around 10 last night. After lunch we went to see the new Iron Man movie. They love it, I thought it was OK.

Thursday, April 18, 2013
Hello and Welcome
Allow me to kick this blog off by showing you a recently made card using my current favorite die (http://www.die-versions.com/
Using a 4x6 rectangle piece of wood grain pattern paper, I die cut the happy birthday greeting. I trimmed the inside of the rectangle and made it into a tag w/a green re-enforced hole and a green ribbon. I cut a green mat for it and glued it straight onto the card front. I popped up the tag and inserted the happy birthday greeting on a slight angle, gluing it onto the green paper. For a little extra pop, I outlined the greeting w/a black pen.

This card is going to my little brother, who's turning 41 on Saturday. I hope he likes it :)
Subscribe to:
Posts (Atom)